

Why This Project?
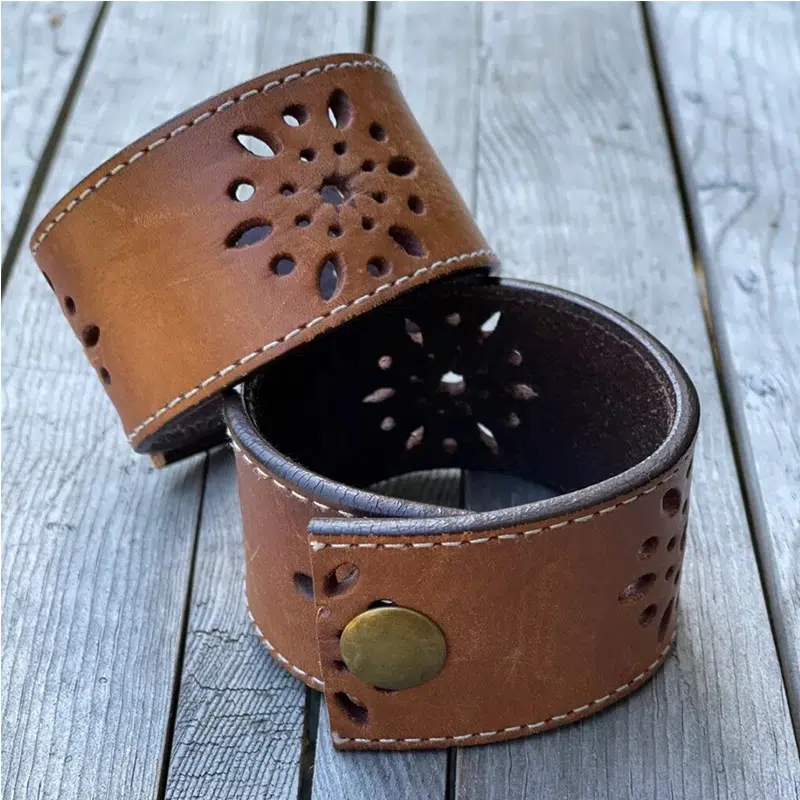
Most people have a worn-out leather belt in their closet. The buckle broke; the size is not correct; it has gone out of style. Instead of throwing the old leather belt away, you can make custom cuff bracelets from it.
This article will tell about how do you make leather cuff bracelets out of belts. The instructions are inexpensive, take less than an hour to do, and make a unique item that won’t be found anywhere else.
Materials & Tools Checklist (What You’ll Need)
Materials
The biggest component of your bracelets is going to be old leather belts. Look for different widths between 3/4 of an inch to 2 inches. The thicker belts work better, as they retain their shape better. Different textures, such as smooth leather, embossed leather, or distressed leather, work well. Different colors give you more flexibility in your creativity.
Optional embellishments enable you to individualize your design. Metal studs add a tough look to your leather bracelet. Rivets give an industrial look. Snaps have both a functional and decorative purpose. Leather dye or acrylic paint changes the color of the bracelet. Small charms add appeal and attach with jump rings. Decorative lace adds texture to the center of the bracelet when glued down.
Essential Tools
The following tools should be available for each bracelet.
- Measuring Tape or Ruler: Used for proper measurements of the wrist.
- Scissors or Utility Knife: It will be necessary to have a sharp blade to cut without ripping the leather.
- Leather Hole Punch or Awl: Making a round hole for the snaps and fasteners (or little duplicating bits may be used).
- Leather Glue: Not necessary for adhesive purposes but very useful if you are using combinations of materials or attaching any trinkets.
- Cutting Mat: Protects the work area and gives you a place to work while cutting safely.
- Sandpaper: 220 grit will smooth out the rough edges of the leather after the cutting is done.
Hardware (Closures)
Pick one closure method for your bracelet:
Snap or rivet kits make the most professional look. These metal fasteners look clean and will last several years.
Buckle re-use is the easiest choice. Leave the original belt buckle at one end. Cut the other end to length and punch or cut new holes if required. This method takes the least amount of time since the closure is there.
Velcro or magnetic clasps are the easiest choice for the beginner. Glue or rivet these on each end of your strip of leather. They open and close quickly. Check out leather bracelet clasp types for all your known hardware ideas.
Step-by-Step Instructions
Prep and Planning
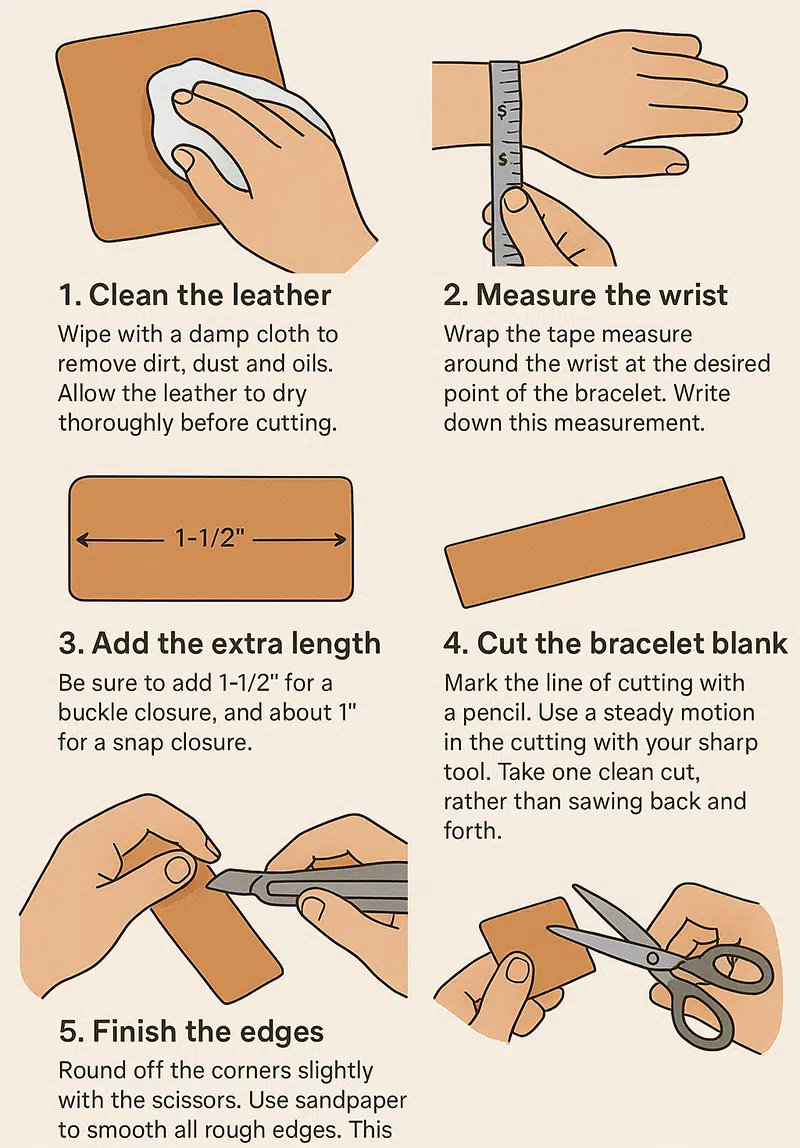
Proper preparation is the key to good results in all further work with leather.
1. Clean the leather. Wipe with a damp cloth to remove dirt, dust and oils. Allow the leather to dry thoroughly before cutting.
2. Measure the wrist. Wrap the tape measure around the wrist at the desired point of the bracelet. Write down this measurement.
3. Add the extra length. Be sure to add 1-1/2″ for a buckle closure, and about 1″ for a snap closure.
4. Cut the bracelet blank. Mark the line of cutting with a pencil. Use a steady motion in the cutting with your sharp tool. Take one clean cut, rather than sawing back and forth.
5. Finish the edges. Round off the corners slightly with the scissors. Use sandpaper to smooth all rough edges. This gives the bracelet a more finished and less amateurish appearance.
Here’s a quick sizing guide:
| Wrist Size | Overlap Needed | Total Cut Length |
| 6 inches | 1 inch | 7 inches |
| 7 inches | 1 inch | 8 inches |
| 8 inches | 1.5 inch | 9.5 inches |
Reference the bracelet size chart for more detailed measurements.
Adding the Closure
Choose the closure device you will be using and do the following:
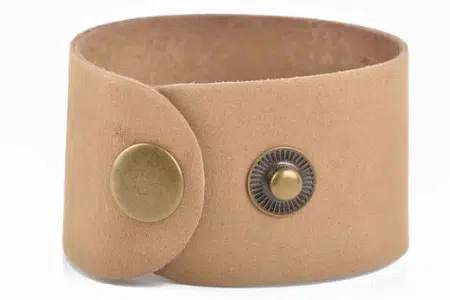
For Snaps: Mark on both ends of the leather strap where you want to have the snap. These markings should meet when the bracelet wraps around the wrist. Punch holes in these markings with the leather hole punch. Usually, you hammer or press the male half of the snap on one end and the female half on the opposite end. Try the snap several times to see if it fits tightly.
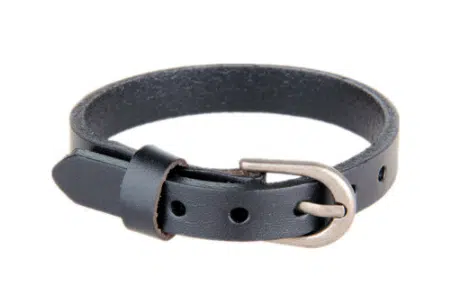
For Re-Using Buckle: Leave the buckle end of the belt intact. Trim the other end to any desired length. If the original holes do not meet correctly, punch in 2-3 others near this end. The holes may be spaced about 1/2 inch apart to allow for size adjusting.
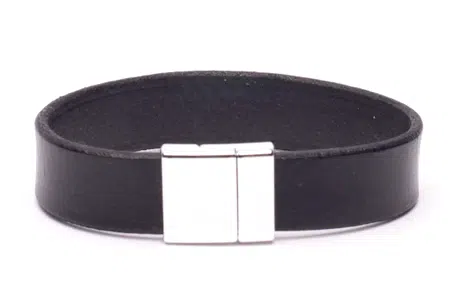
For Magnetic Clasps: Put leather glue on the flat side of each magnet part. Pushed these on each end of the bracelet. Let the glue dry at least twenty-four hours before using the bracelet.
Customizing and Decorating
This is where you make the bracelet your own. Here are four distinct styles:
You can follow the tips below to make a distinct bracelet.
Here are four types of styles to choose from:
1. The Minimalist Cuff
You can leave the leather plain or add one small detail. For example, a single metal stamp or a small burn mark with a wood-burning tool adds charm. This style works well with braided leather bracelets if you wish to stack several together.
2. The Studded Rocker
First make your pattern with a pencil. Popular patterns include a straight line down the middle, zig-zag or corner accents. Punch little holes at each mark. Put the metal studs through from the front. Bend over the prongs on the back to secure them in. This takes 20-30 minutes, but the results are impressive.
3. The Layered Look
3. The Layered Look
Cut a narrow strip of a contrasting leather, about 1/2 inch in width. Put leather glue on the back of the strip and center it down the middle of the bracelet. Weigh down with books until the glue is dry. You can also use a strip of fabric ribbon, suede, or decorative lace for the top design. Layering adds depth and eye interest.
4. The Painted Design
This style uses either acrylic paint or leather paint. Apply geometric designs such as stripes, triangles, or dots. Paint in your initials or a simple symbol. Each color should be allowed to dry before applying the next. When finished, a clear leather sealer spray may be used to protect the paint from scratching.
Tips & Troubleshooting (Pro Advice)
Thrift Stores: Old belts at thrift stores will cost less. Look for embossed designs on theirs, woven textures, or odd colors that cannot be found in a new belt.
Finishing the Edge: The rough cut edges look unfinished. Smooth with 220-grit sandpaper to make them look better. A burnisher for leather (a wooden tool) can round off your edges both nicely and professionally.
Problems with Thick Leather: Some belts are so thick they will not cut with a stab in one pass. Use multiple light cuts with your utility knife rather than try to make one heavy cut. This gives better control, and the blade does not slip.
Size Adjustments: Did you make your bracelet too long? Check how to shorten leather bracelets for adjustment ideas. Too tight? Check how to stretch leather bracelets for information.
Working with Metal: When working with metal studs or charms, first make a pattern on paper. Tape the paper to your leather, then punch through both. This will ensure even spacing before you make holes.
Color Coordination: Match the color of your leather bracelet to rings you own, necklaces, or watches you own. This is a way to ensure a complete look rather than merely used in random accessories.
Conclusion
Following this tutorial makes creating leather cuff bracelets from old belts simple and fun. Each bracelet takes less than an hour to make and costs almost nothing. These pieces work as personalized gifts for friends, family members, or yourself. Every bracelet becomes unique because you control the width, color, texture, and decoration.
If you want professionally crafted leather bracelets with custom designs, contact OOTB. We’re a China-based leather bracelet manufacturer with over 10 years of export experience.
We offer more than 500 different fashionable leather bracelets that we can customize to your exact specifications.
 English
  French
  Spanish
  German
  Russian
  Turkish
  Portuguese