


Key Takeaways
| Method | Time Required | Difficulty | Best Stone Types | Tools Needed |
| Wire Wrapping | 30-45 minutes | Easy | Rough stones, crystals, druzy | Wire, pliers, cutters |
| Drilling | 15-20 minutes | Medium | Hard stones, sliced stones | Drill, diamond bits, goggles |
Introduction
You may want to DIY stone jewelry for your beloveds or start your own business.
Making stone jewelry at home is easier than one might think. Learn two strategies using the guidance below. The first approach calls for enclosing the wire around the stone without any holes; the second technique calls for a neat hole for a more professional appearance.
Let’s start with us and learn how to make stone jewelry.
Best Stones to Choose Before You Start Making Jewelry
Picking the right stone makes the difference between a piece that looks homemade and one that looks professional. Different stones work better with different methods.
Druzy Stones
Tiny crystals adorn the surface of druzy stones. Like natural glitter, these tiny crystals capture light and glisten. The rough surface improves wire grasp, hence they are ideal for wire wrapping.
Common druzy combinations include calcite, garnet, and quartz. Each creates vary colors and textures. Hot pink cobalto calcite druzy is rare and creates stunning pink jewelry. The crystal surface gives you natural texture, so wire can wrap around securely.
Water Worn Rough Stones
Water worn stones have smooth edges but keep the natural texture. Rivers and oceans tumble these stones for years, which creates unique shapes that work perfectly for jewelry.
The rough texture gives wire something to grip. You can build a wire cage around uneven shapes or drill holes to use them as large beads. Clear wire frequently reveals intriguing patterns on river and beach rocks.
Crystal Points and Formations
Crystals, such as quartz, tourmaline, and iolite make beautiful jewelry. Their own points and features make intriguing forms that catch light.
Quartz crystals are hard and durable. They come in many colors – clear, purple (amethyst), yellow (citrine), and pink (rose quartz). Tourmaline crystals often have multiple colors in one stone. Iolite has pleochroic properties, this means it changes color when you look at it from different angles.
Sliced Stone Options
Sliced stones show off internal patterns that you can’t see from the outside. Cutting stones into thin slices reveals hidden beauty.
Watermelon tourmaline gets its name from its green outer edge and pink center. When sliced, it looks just like a watermelon slice. When banded agate is sliced, its multicolored stripes provide a work of natural art.
Opaque Stone Choices
Opaque stones don’t let light pass through them. This makes their surface color and texture the main attraction. Bright colors grab people’s focus and look great against skin.
Deep blue lapis lazuli with gold flecks is the color of this stone. Turquoise varies from green to sky blue. Both have seen jewellery use for millennia. Among the hues opaque quartz are black onyx, red jasper, and green aventurine.
Preparing Your Stones: Cutting and Polishing Basics
Most stones need some preparation before you make them into jewelry. This doesn’t mean expensive equipment – simple tools work fine for basic preparation.
When to cut stones:
- Remove broken or ugly sections
- Provide flat areas for winding wires.
- Make stones the right size for jewelry
When to polish stones:
- Rough, smooth edges that could snag clothes
- Bring out natural colors
- Create professional-looking surfaces
Basic cutting tools:
- Tile saw for precise cutting
- Grinding wheel for shaping
- Sandpaper to smooth (start with 220 grit, finish with 400 grit)
Safety tips:
- Wear safety eyewear at all times.
- Work in a well-ventilated area
- When cutting, keep the stones moist to avoid dust.
Method 1: Wire-Wrapped Stone Jewelry (No Drilling Required)
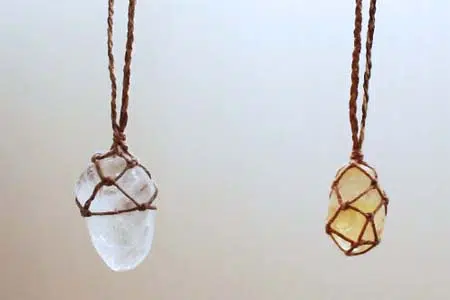
Wire wrapping creates beautiful jewelry without damaging your stones. This method works especially well for costly or delicate stones that you don’t want to drill.
Essential Tools:
Wire cutters – These cut clean wire ends without crushing the wire. Because they cut flat on one side, flush cutters are the most effective.
Round nose pliers – The round tips let you make perfect curves and loops. Different sized tips create different sized loops.
24-gauge wire – This thickness bends easily but stays strong enough for jewelry. Copper wire is cheapest for practice. Silver-filled wire can make your jewelry looks professional but costs more.
Stone selection – Oval and teardrop shapes is the best option. Avoid perfectly round stones because wire slips off them.
Necklace chain – Choose a chain that matches your wire color. 18-20 inches works for most people.
Video Guide to Follow
Steps 1: Cut The Wire to Size
Cut two pieces of 24-gauge wire, each to be 5 inches long.You can use wire cutters for accurate cuts. Sharp edges from rough cuts can hurt skin.
For heavy stones over 1 inch, use 22-gauge wire instead. The thicker wire holds heavier stone without bending.
Steps 2: Make the First Wire Twist
Cross the two wires in the middle of them, twist them together using your index finger and thumb, and make about 3-4 complete turns.
You need to twist them tight enough to hold but not so tight that the wire kinks. Twist it again and again a few times before working with your final wires.
Steps 3: Position Wire on Your Stone
Place your stone between the two wires. The twisted part should sit under the widest part of the stone. This creates the most secure hold.
Move the stone up and down until it is in the balanced place. To achieve the proper fit, you should remove and add a few twists.
Steps 4: Create the Basket Base
Bring the other ends of the wire together under the stone. Cross them and twist just similar as you did in Step two. This creates a wire basket that holds your stone.
The stone should feel secure but not crushed. If the wire is too tight, untwist it slightly and test it again.
Steps 5: Complete Both Side Twists
Remove the stone temporarily – this makes twisting easier. Twist the second side, and make sure the twisted sections are the same length as the first side.
Put the stone back in to test the fit. You should have a wire basket that holds your stone securely.
Step 6: Secure the Stone
Take one wire from each side and bend them up toward the top of the stone. These four wires will form the pendant’s “stem.”
Pair the wires—one from each side—together. And you have created two pairs of wires going upward.
Step 7: Twist Wires into Pendant Stem
Twist each pair of wires together for at least 1 inch. This creates the stem that will hold your loop.
After twisting, bend both twisted sections at roughly a 90-degree angle. Wrap one twisted section around the other to lock them together.
Steps 8: Trim Up Wire Ends
Cut the excess wire ends with your wire cutters. You should cut close to the wrapped section but leave about 1/8 inch.
And then, tuck the sharp ends into the wrapped wire with your pliers. This prevents scratching and creates a clean appearance.
Steps 9: Create the Hanging Loop
Use your round nose pliers and grip the wire about 1/4 inch from the end to form a loop at the top of the stem. Make the loop be big enough for your chain but not so big that it looks clunky.
Steps 10: Final Assembly
Check all your wire connections. Adjust any loose wraps and make sure no sharp edges stick out. Thread your chain through the loop. Your stone jewelry is ready to wear.
Method 2: Drilled Stone Jewelry
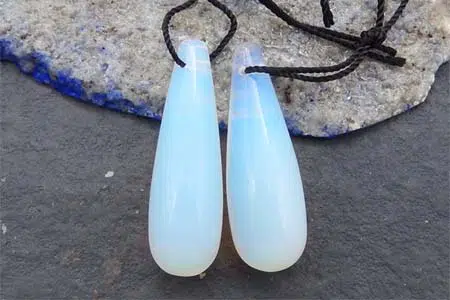
Drilling creates the cleanest, most professional look for stone jewelry. The hole goes straight through the stone, so that basic chains or loops can be added.
Drilling Tools You Need
Rock selection – Hard stones like agate and quartz can be drilled best. Don’t use soft stones, such as turquoise; they will lead to cracks or chips.
Safety goggles – Stone dust and small chips fly when drilling. Protect your eyes with wrap-around safety glasses.
Small piece of wood – This goes under your stone to prevent cracking when the drill breaks through.
Tiny plastic container – Catches stone dust and small pieces. Make your make your worktop clean.
Hollow, diamond-tipped coring bits – These cut through stone much better than regular drill bits. The hollow center removes material as you drill.
High-speed rotary tool – A Dremel-type tool works perfectly. You need variable speed control to avoid overheating.
Video Guide to Follow
Steps 1: Wear Protection
Wear goggles before you start. Stone dust can damage your eyes permanently.
Set up your workplace with enough lighting and ventilation. Stone dust is fine and gets everywhere.
Steps 2: Secure The Stone
Place your stone on the piece of wood. The wood prevents the stone from cracking when the drill bit breaks through the other side.
Hold the stone tightly with your non-drilling hand. Avoid touching the area you’re drilling with your fingertips.
Holding technique:
- Grip it firmly but don’t squeeze
- Keep fingers at least 1 inch from the drilling spot
- The stone should not move when you start drilling
Step 3: Start Drilling
Turn on your rotary tool at medium speed. Too fast creates heat that can crack the stone, and if it is too slow, it won’t cut effectively.
Keep yourself alert and be careful. Make sure your rotary tools and hands stay dry – wet hands can slip.
Use an up and down motion with the drill. This clears stone dust from the hole, and it can avoid overheating. Expect drilling to take 3-5 minutes for most stones.
Drilling technique:
- First, please use light pressure
- Lift the drill every few seconds
- Watch for the bit to break through
- Don’t force it – let the diamond bit do it
Steps 4: Complete Your Jewelry
Once you have a clean hole, you can put in a basic or exquisite loop or just even a jump ring. Thread your chain through the loop to get a necklace with a pendant.
Conclusion
Both drilling and wire wrapping work great for making stone jewelry at home. Wire wrapping preserves your stones, and it can be used for any shape of stone. Drilling creates the cleanest, most professional look.
If you’re new to making jewelry, try the wire wrapping method first. It’s more forgiving and doesn’t require power tools. Try drilling for stones to make jewelry once you are good at drilling on stone. OOTB offers different jewelry stones for you to choose from. Contact us to get a price.
Related Resouces
1. Make Stone Jewelry Tools Guide – Gemsociety

 English
  French
  Spanish
  German
  Russian
  Turkish
  Portuguese