Introduction
Do you want to learn how to make a braided leather bracelet that looks great?
This guide lists the exact steps necessary to do the 8-strand round braid. This braid is also called the 8-strand sennet or basic spiral braid.
This final bracelet may appear complicated and professional, but the pattern is quite simple and easy to remember. You only repeat a few simple moves. If you follow my steps, you will end up with a strong, gold, custom-fitted bracelet that you made yourself.
Gathering Your Materials & Tools (The Shopping List)
Essential Materials
1. Leather Cord (8 Strands)
You need eight separate pieces of leather cord; 3 mm thick will be good for braiding. If you use a thicker cord, the braid will get bulky fast. All eight cords must be the same thickness and material. If you mix leather, you will get an uneven texture.
2. Clasp/Closure
Choose the clasp that can fit the leather cord. For example, if you choose the inner tube of the clasp that is 12 mm, then it’s better to weave the leather cord in 11.5 to 12.5 mm. If the inner is too small, the leather cord that you braided cannot be inserted into the clasp. Check out different leather bracelet clasp types to find what suits your design.
3. Strong Adhesive
You need an adhesive that permanently bonds leather. Super glue dries quickly, but it becomes brittle. E6000 remains flexible and deals with daily wear better. Leather cement provides the strongest bond of leather for heavy-duty bracelets. Choose based on how much stress your bracelet will endure.
4. 8mm Reinforcement Strap
This is a flat leather strip, from which the rest follows. And it’s determined the length and width of your leather bracelet. All eight strands are glued to this at the beginning so that the bundle is organized and prevents individual cords from pulling loose. Please cut the width to 8 mm and the length to 24 cm, with 3 mm leather cord braided; the thickness will be within 11.5 to 12.5 mm, which fits to clasp.
Essential Tools
| Tool | Purpose | Why It Matters |
| Sharp Scissors/Rotary Cutter | Clean cord cuts | Frayed ends won’t fit in clasps |
| Ruler/Measuring Tape | Accurate measurements | Wrong length = unwearable bracelet |
| Rigid Clamp/Clipboard | Holds work steady | Critical for 8-strand organization |
| Binder Clips/Tape | Temporary securing | Keeps pattern from unraveling |
| Pliers | Attaching jump rings | Needed for lobster clasp styles |
For an eight-strand braid, a stable anchor point is even more important than for simpler braids. The cords untwist and tangle together if you don’t keep them under constant tension. I always use a heavy clipboard clamped to the edge of my desk.
The 8-Strand Round Braid Technique (Step-by-Step)
You can also check the video to study how to make a braided leather bracelet.
Step 1: Measurement and Preparation
A. Determine Bracelet Length

Measure your wrist around, where the bracelet will sit, with a tape measure. To this number, add the inner size of the clasp. Most clasps put an addition of 1-2cm to the overall length. Check this measurement against the bracelet size charts to make sure of a proper fit.
B. Prepare the Reinforcement Strip

Cut an 8 mm flat leather strip the length of the leather bracelet you want. But allow for 4-5 cm extra for the final cut, for instance, if you want 19 cm length bracelet, it should be cut to 24 cm.
C. Calculate Cord Length

Use the 3x rule for each strand. Take the finished length of the bracelet and multiply it by three. Add another 10 cm on safely. eg. A 19 cm-long finished bracelet is wanted, the calculation is 19 cm x 3 = 57 cm, plus 10 cm = 67 cm for a strand.
D. The Grouping
Place all 8 strands together. Line one end up so that all cords are finished off at exactly the same point. Even a difference of 2mm means trouble later on in the braiding.
Step 2: Securing the Start and Setting Up the Braid
A. Initial Anchor

Spread glue all over the 8 mm reinforcing strip. Press down all eight 3 mm cords on top of it in one row. The glue must dry completely before you start to braid. Usually about 5-10 minutes with super glue, 20-30 minutes if you use E6000.
B. Clamp Down
You must attach the glued end to your clipboard or clamp it to the edge of the table. The anchor point may NOT move at ALL while you are braiding. Test this out by tugging gently on the cords.
C. Organization is Key

Spread the eight loose cords out into two groups. The left side will have four cords, the right side will have four cords. The cords must coincide in their own positions from the outside toward the center. Mentally Number them: the left side has cords 1, 2, 3, 4, (from outside to center), the right side has cords 1, 2, 3, 4 (from outside to center).
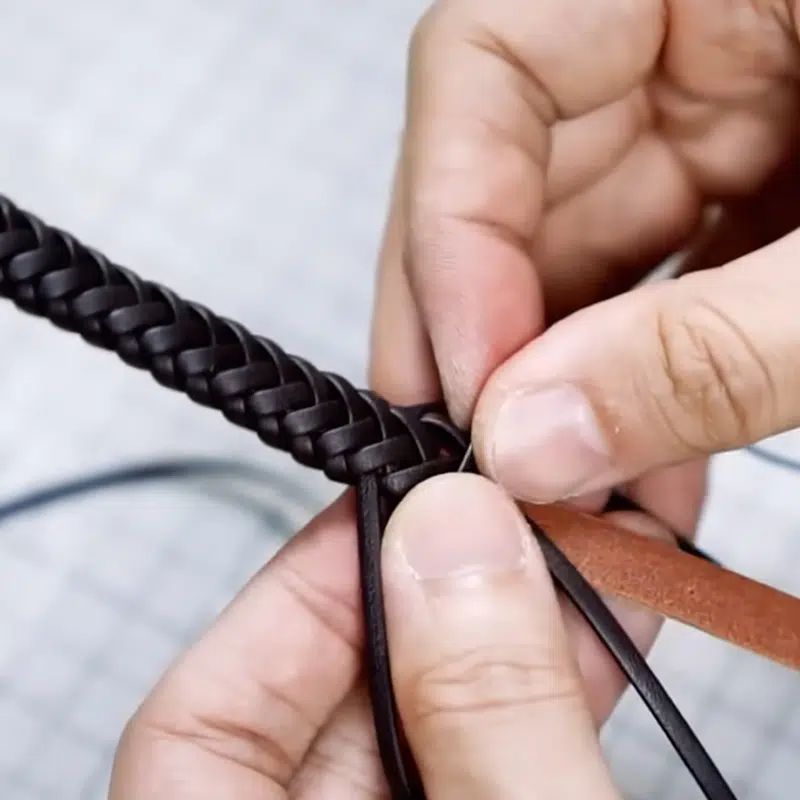
Step 3: Executing the Flat Braid Pattern
A. The Left-Side Move (L4, O2, U2)

- Grab the outermost cord on the left (cord #4)
- Bring it over the two cords nearest to it (cords #3 and #2)
- Tuck it under the remaining two center cords
- It now sits as the innermost cord on the right side
B. The Right-Side Move (R4, O2, U2)

- Grab the outermost cord on the right (cord #4)
- Bring it over the two cords nearest to it (cords #3 and #2)
- Tuck it under the remaining two center cords
- It now sits as the innermost cord on the left side
C. The Rhythm

Repeat these two moves in order:
- Left outer → over 2, under 2 → becomes right inner
- Right outer → over 2, under 2 → becomes left inner
- Left outer → over 2, under 2 → becomes right inner
- Right outer → over 2, under 2 → becomes left inner
After doing five or six complete cycles you will be able to see the flat tube shape forming. pull all the cords firmly after each movement. Loose tension causes a loose, uneven braid. Firm tension causes a solid rope structure.
Step 4: Finishing and Attaching the Closure
A. Stop Braiding
Continue braiding until the rope reaches the desired length. Leave about 1.5cm unbraided cord at one end. This is necessary for securing and trimming.
B. Temporary Hold

Secure the unbraided part tightly with tape or thin wire. Wrap it 4 or 5 times. Press the combined bundle as tightly as you can while wrapping. This compressing keeps all eight strings together.
C. Trimming and Gluing
Put glue over the whole taped part. Let it soak into the leather and dry hard. After it is hard, trim the bundle off flush with sharp scissors. The end cut should be flat and even like a pencil eraser.
D. Clasp Attachment

Fill the end cap of the clasp with glue. Insert the trimmed end of the braid into the cap opening. Hold it steady for 30 seconds. Set it aside to cure the recommended time on the glue bottle (usually 24 hours for full strength). Repeat on the other end with the reinforcing strip.
Troubleshooting and Care Tips
Troubleshooting: Common Issues
| Problem | Cause | How to Fix It |
| Uneven Braid | You probably went “Over 3” instead of the “Over 2, Under 2” pattern. | Stop and very carefully undo the last few moves. |
| Twisting | The whole bracelet keeps turning on your board. | Your starting anchor was not clamped perfectly flat. Take a break and re-stand your start. |
| Too Loose | You did not pull the cord tight enough after each turn. | Go back and use a little more tension so that the cord will be tight. |
Care for Your Leather Bracelet
Your bracelet is made from a leather material that needs to be treated with a little care in order to last a long time.
- Conditioning: Leather can become dry over time. Use a very small amount of leather conditioner or a natural oil to prevent the leather from cracking.
- Water: Do not get the bracelet very wet. Being too wet can stretch the leather and may weaken the glue that holds the clasp.
- Storage: Store the bracelet out of direct sunlight when it is not being worn.
Your Finished Masterpiece
Now you have created your own braided leather bracelet successfully! The 8-strand technique gives you a durable and beautiful accessory that will last. If you have followed these directions properly, you will have a great piece of leather bracelet.
If you decide that you would rather buy the high-quality leather bracelet without the hassle, you can always send an inquiry to OOTB. We offer over 500 styles for you to choose from.


